
Introduction
Use Leonardo Image Guidance is a family of conditioning mechanisms inside Leonardo Image Guidance that lets you steer image generators with both visual and textual signals. Leonardo Image Guidance In plain terms, instead of only giving the model words, you also give it pictures that act like constraints and examples. Leonardo Image Guidance This gives you far more control over the final result — useful when you need the same character to appear across different scenes, when you want to transfer a painterly brush style, when you need a sketch to become a finished artwork, or when you must lock a pose and proportions precisely.
Viewed through an NLP/ML lens, Image Guidance functions as multimodal conditioning: images are converted into latent constraints and attention priors that the diffusion model uses to bias sampling. Practically, the system mixes tokenized text prompts with encoded image features and map-based control signals (edges, depth maps, pose skeletons). The result: predictable, reproducible outputs instead of purely stochastic generations.
What is Image Guidance?
In ML terms, Image Guidance is multimodal conditioning applied to a generative diffusion pipeline. It supplies visual priors that are encoded and fused with textual embeddings; this fusion biases the sampling trajectory toward outputs that reflect the reference images’ structure, color statistics, or identity features. Rather than relying solely on textual tokens, you provide image-conditioned anchor points that the model treats as soft constraints.
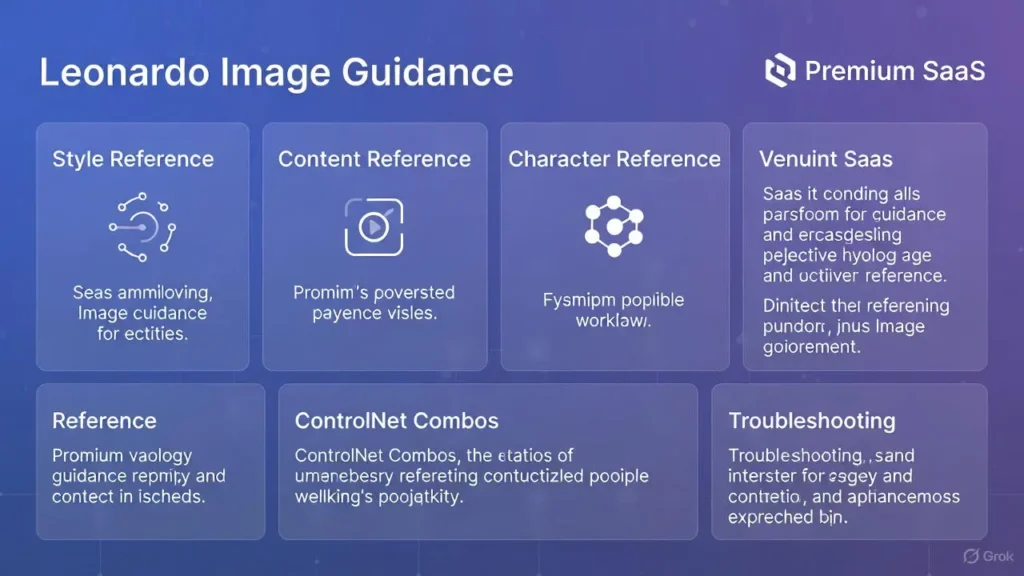
Leonardo Image Guidance commonly handles:
- Style: Transfers textural statistics, brushstrokes, color grading, and lighting priors.
- Content: Preserves layout, object placement, and spatial relations.
- Character: Encodes identity embeddings so the same person/character remains recognizable across renders.
- Edge / Lineart: Uses skeletonized outlines to constrain shape and stroke continuity.
- Pose / Depth / Normal Maps: Injects 3D structural priors so anatomy and volumetric shading remain consistent.
Think of Image Guidance as an engineered way to give the model observations in addition to instructions. These observations reduce the entropy of the output distribution and make outputs reproducible.
WhyLeonardo Image Guidance Matters
- It reduces randomness and drift.
- Enables brand and character consistency at scale.
- Allows deterministic editing: change lighting without changing identity.
- Makes sketch → finish workflows reliable for production.
- Converts creative intuition into repeatable, documented presets.
Quick Glossary
- Style Reference — An image acting as a statistical prior for color, texture, tone, and stroke patterns.
- Content Reference — An image anchoring composition and subject placement; acts like a spatial layout template.
- Character Reference — One or multiple images used to create an identity embedding for consistent faces/figures.
- Edge / Lineart Guidance — Binary/continuous outline maps that the model uses to preserve stroke geometry.
- Pose / Depth / Normal Maps — Structural maps that supply 3D cues for anatomy and lighting.
- ControlNet (analogy) — A map-based control mechanism popularized for diffusion models; Leonardo implements similar map conditioning but wrapped with user-focused controls.
- Weight / Coefficient / Influence — Numerical scalar(s) applied to each reference indicating the strength of conditioning.
- Seed — Deterministic initializer for pseudorandom sampling that enables reproducibility.
How Leonardo Image Guidance Works
At an abstraction level similar to many multimodal generation systems, the workflow follows four phases:
Step 1 — Upload
Upload one or more images. Images are encoded into latent representations and map features (edges, depth, pose). Higher-resolution references yield more reliable priors.
Step 2 — Assign Guidance Modes
Each uploaded image can be labeled as Style, Content, Character, Edge, Pose, or Depth. These labels determine the encoding pipeline and which modules (style encoder, spatial prior encoder, identity encoder) are used.
Step 3 — Tune Weights (Influence Coefficients)
Set numeric weights for each reference. Weights map to loss-term multipliers in the conditioning process: larger weights pull the generated sample closer to the image prior.
- High weight → strict control (low variance).
- Mid-weight → balance between instruction and inspiration.
- Low weight → subtle nudging.
Step 4 — Generate with Prompt + Model Settings
Combine a textual prompt (tokenized) with the conditioned latents and pass them through the diffusion sampler. Use model parameters (steps, CFG/scale, seed) to finalize sampling.
Why weights matter: The model’s latent sampling is guided by the weighted sum of conditioning forces. Getting weights right is the core of high-quality, predictable results.
When to Use Each Image Guidance Mode
Style Reference — Use When:
You need consistent aesthetics across images.
You want fixed color palettes, lighting, or brushwork.
You’re producing campaign assets that must match.
Content Reference — Use When:
Layout and object placement must remain identical.
You’re doing product shots or templates. Framing must be preserved across variations.
Character Reference — Use When:
You need the same character/person across multiple scenes.
Stable facial identity and features are required.
You can supply multiple angles for higher fidelity.
Edge / Lineart — Use When:
You have lineart that must remain intact.
Converting sketches to clean, filled art.
Managing stroke quality is crucial.
Pose / Depth — Use When:
Accurate anatomy and 3D consistency are needed.
Storyboards or frame-to-frame continuity is required.
Lighting and occlusion must match across sequences.
Step-by-Step Workflows
Below are four production-grade multimodal conditioning workflows reframed as ML pipelines.
Photorealism / Environment Swap
Goal: Swap backgrounds or lighting while preserving subject realism.
Pipeline:
- Upload base photograph (1024–2048 px recommended).
- Encode as Content Reference → set influence 0.9 (strong spatial prior).
- Add a Style Reference (target look) → influence 0.2.
- Select a photoreal diffusion checkpoint (Flux/Photoreal-style).
- Configure sampler: Steps = 40, CFG/scale ≈ 7.0, Seed = fixed (e.g., 12345).
- Use mask-based inpainting on the subject edge when background leakage occurs.
Preset (copyable): Content: 0.9 | Style: 0.2 | Steps: 40 | CFG: 7.0 | Model: Photoreal-flux | Seed: 12345
Character Consistency Across Scenes
Goal: Maintain identity across different lighting and contexts.
Pipeline:
- Upload 2–4 face/character Images (front, 3/4, side).
- Encode them as Character Reference and aggregate identity embedding.
- Set combined identity influence ≈ 0.85.
- Optionally add Style Reference at 0.3 for consistent rendering.
- Sampler: Steps ≈ 35, CFG ≈ 6.5, Seed = 54321.
Preset: Character: 0.85 | Style: 0.3 | Steps: 35 | CFG: 6.5 | Seed: 54321
Sketch → Finished (Edge + Style)
Goal: Preserve sketch lines and fill with a specified style.
Pipeline:
- Upload high-resolution lineart.
- Encode as Edge Guidance → influence 1.0 (absolute).
- Add Style Reference at 0.6.
- Sampler: Steps = 30, CFG = 6.0, Seed = 98765.
- Postprocess: small denoise inpaint passes and stroke refinement.
Preset: Edge: 1.0 | Style: 0.6 | Steps: 30 | CFG: 6.0 | Seed: 98765
Multi-ControlNet
Goal: High-precision synthesis using multiple conditioning maps.
Pipeline:
- Upload base photo, pose skeleton map, and lineart.
- Assign weights: Pose = 1.0, Edge = 0.9, Style = 0.4.
- Sampler: Steps = 40, CFG ≈ 6.0, Seed = 24680.
- Run composite generation and fix minor artifacts with localized inpainting.
Preset: Pose: 1.0 | Edge: 0.9 | Style: 0.4 | Steps: 40 | CFG: 6.0 | Seed: 24680
Exact Settings & Reproducible Presets
Use this for copy/paste reproducibility in your publishing resources.
| Workflow | Primary Controls (weights) | Steps | CFG/Scale | Seed |
| Photorealism | Content 0.9, Style 0.2 | 30–50 | 6.5–8.0 | 12345 |
| Character Consistency | Character 0.85, Style 0.3 | 30–40 | 6.0–6.5 | 54321 |
| Sketch → Finished | Edge 1.0, Style 0.6 | 25–35 | 5.5–6.5 | 98765 |
| Multi-ControlNet | Pose 1.0, Edge 0.9, Style 0.4 | 35–45 | 5.5–7.0 | 24680 |
Combining Multiple References — Practical Recipes
- Start with structural priors — Pose, depth, edge. These reduce spatial variance first.
- Add low-to-medium style priors —Textures, color grading, brushstrokes. Keep style influence less than structural influence for fidelity.
- Add character/content references only if necessary — These are identity and layout anchors.
- Test across seeds —Run 2–3 seeds, keep metadata.
- Avoid Turning all weights high simultaneously; that causes incoherent averaging and ghosting.
Pitfalls To Avoid
- All-high weights → blends and ghosting.
- Low-res references → jitter and loss of fine detail.
- Not saving seed/model/version → unreproducible results.
Common Problems & Practical Fixes
Character Drift
- Symptoms: Face changes across renders; identity is inconsistent.
- Fixes: Raise Character weight (0.6 → 0.8+), add more angles for identity embedding, reduce Style weight if it’s altering landmarks, lock seed.
Background Bleeding
- Symptoms: Reference background leaks into foreground subject.
- Fixes: Lower Content weight, use a tight mask on the subject, or generate the subject and background in separate passes and composite.
Overfitting to Style
- Symptoms: Facial features or shapes are dominated by stylistic artifacts.
- Fixes: Lower Style weight, increase Steps to let sampler refine, slightly raise CFG to keep prompt guidance aligned.
Problem: Edge / Line Jitter
- Symptoms: Lineart becomes rough or misaligned.
- Fixes: Use high-resolution lineart, set Edge weight to 1.0, mask strokes, and inpaint.
Ghosting in Multi-Reference
- Symptoms: Multiple conflicting references produce semi-transparent overlays.
- Fixes: Reduce conflicting weights, isolate conflicting maps into separate runs, or increase the structural prior’s confidence.
Best Image Hygiene Practices
- Use high-contrast, high-resolution images. Encode at recommended pixel sizes.
- Crop tightly to the subject to reduce irrelevant priors.
- Maintain consistent file naming and metadata logs for references.
- Store seed, model checkpoint, and exact weight values alongside the images.
- Use a preset registry (JSON exports) to enable collaborators to instantiate experiments.
- Keep before/after galleries to document the effect of changes.
Case Studies
Beach → Golden Hour Portrait
Settings: Content 0.9 | Style 0.2 | Steps 40 | CFG 7.0 | Seed 12345
Outcome: preserved subject pose while adapting warm evening color palette and realistic sun occlusion.
Character Across 3 Scenes
Settings: Character 0.85 | Style 0.25 | Steps 35 | Seed 54321
Outcome: stable identity across diverse lighting and wardrobe changes; minor mouth-shape variance fixed by increasing character influence.
Sketch → Finished Illustration
Settings: Edge 1.0 | Style 0.6 | Steps 30 | Seed 98765
Outcome: linework preserved; color fills matched the brush texture due to the prior style; some edge artifacts were corrected with inpainting.
Comparison Table — Leonardo Image Guidance Modes
| Mode | Use Case | Typical Weight | Pros | Cons |
| Style Reference | Transfer look/mood | 0.2–0.6 | Strong style Consistency | Can overpower facial features |
| Content Reference | Preserve layout | 0.7–0.95 | Keeps the composition stable | Can cause background bleed |
| Character Reference | Maintain identity | 0.7–0.95 | Accurate consistent identity | Needs multiple angles |
| Edge / Lineart | Sketch → finish | 0.9–1.0 | Locks outlines | Low-res causes jitter |
| Pose / Depth | Accurate pose/3D | 0.8–1.0 | Stable anatomy | Needs a clear pose map |
Pros & Cons Leonardo Image Guidance
Pros
- Granular creative control.
- Repeatable, documented outputs.
- Suitable for brand and production pipelines.
- Multi-map support for complex scenes.
Cons
- Requires tuning and experience.
- Overconstrained setups can cause artifacts.
- Some advanced features may be premium.
- Must track seeds and model snapshots for reproducibility.
Quick Cheat Sheet
- Photorealism: Content 0.9 | Style 0.2 | Steps 40 | CFG 7.0 | Seed 12345
- Character Batch: Character 0.85 | Style 0.3 | Steps 35 | CFG 6.5 | Seed 54321
- Sketch: Edge 1.0 | Style 0.6 | Steps 30 | CFG 6.0 | Seed 98765
Reproducibility Lab — A/B Test Process
| Step | Action | Why |
| 1 | Select base reference + target style | Controlled input baseline |
| 2 | Run baseline (text-only) | Understand unconditioned model behavior |
| 3 | Add one structural map | Measure structural improvement |
| 4 | Add style + character | Full guided configuration |
| 5 | Compare side-by-side | Quantitative and qualitative metrics |
Evaluation tips: Use perceptual distance metrics, structural similarity (SSIM) for layout, and human evaluators for identity fidelity.
FAQs Leonardo Image Guidance
Style copies look, while Content keeps layout and composition.
Leonardo supports multiple uploads. Premium plans allow more.
Increase Character weight, add more angles, and use a fixed seed.
No. Too many high weights cause ghosting. Use them selectively.
Conclusion Leonardo Image Guidance
Leonardo Image Guidance is the engineered bridge between artist intent and model capability. By converting images into conditioning priors and combining them with textual prompts, the system gives creators the ability to produce deterministic, high-fidelity results. With a modest learning investment in weight tuning, seed management, and map preparation, you can build a reproducible library of presets that scale across projects.
Start with one workflow: Try Photorealism for simple background swaps, Character Consistency for brand characters, or Sketch→Finished when turning drawings into polished art. Always save seeds, log exact weights, version your models, and keep before/after galleries for documentation. Over time, you’ll accumulate a preset registry that transforms generative image work from one-off experiments into predictable production pipelines.