Introduction
Leonardo AI 3D Animation Style The era of flat, painterly AI images is being eclipsed by generators that can implicitly model 3D form, material response, and camera optics inside latent space. Leonardo AI 3D Animation Style is not merely a visual tag; it’s a set of conditioning signals — style presets, learned weightings, and prompt heuristics — that bias the model’s sampling distribution toward render-like outputs with volumetric lighting, layered depth cues, and shader-like material fidelity. Moreover, Leonardo AI 3D Animation Style For concept artists, game designers, and motion directors, the payoff is fast, production-ready frames that read like rendered movie stills and are therefore easier to convert into animatics or short clips.
What is Leonardo AI’s 3D Animation Style?
From an NLP / generative-model perspective, a “style” in platforms like Leonardo.ai functions as a conditioning vector (or set of vectors) that modifies the generator’s prior. When you select the 3D Animation Style, the model:
- Re-weights attention toward features that represent shape and occlusion rather than flat texture strokes. This nudges the decoder towards outputs with coherent shading and silhouette.
- Increases the likelihood of tokens that imply camera and shader metadata (e.g., “rim light”, “subsurface scattering”, “35mm”).
- Biases texture priors so that micro-detail (specular highlights, fabric weave) and material response (gloss, subsurface glow) are more probable.
- Amplifies depth cues like atmospheric haze and layered foreground/midground/background relationships.
Practically:
The preset acts like a learned prompt-template + fine-grained weight adjustment that favors 3D-render-like concepts during sampling. This is why images from the preset tend to look like frames from a CGI render — the latent manifold has been tilted toward “render semantics.” Leonardo’s product pages and docs describe these presets and their usage in the UI and API.
Why the 3D Animation Style Matters
Higher engagement (signal-to-noise). Rendered, cinematic frames have strong compositional and lighting signals that attract attention in portfolios and social feeds.
Production readiness (pipeline-friendly tokens). Because generated frames already encode camera framing, lighting, and materials, they are easier to convert into animatics, depth maps, or motion-ready assets.
Versatility (multi-modal affordance). The same style works for characters, environments, product concepts, and storyboards because it emphasizes photometric and geometric cues over painterly strokes.
Speed & iteration (fast approximate rendering). The style provides quick, plausible 3D-looking frames without the overhead of scene setup, asset modeling, and physical rendering — ideal for early-stage ideation.
Motion pipeline integration. Leonardo.ai exposes Image→Motion recipes (Motion 1.0) and depth/segmentation exports that integrate with them. Use these recipes to interpolate camera motion or animate small parallax shifts. Documentation and recipes are available in Leonardo’s docs.
How the 3D Animation Style
Model + style preset (what happens under the hood)
- Conditioning vector injection: The preset supplies latent biases (like learned prompt templates) that push the sampling toward imagery consistent with cinematic renders.
- Attention modulation: Layers in the transformer’s decoder may be influenced (via learned layer-wise multipliers or embeddings) to prefer shading and geometry tokens.
- Prior reshaping: During sampling (temperature, top-k/top-p), the style may change default sampling hyperparameters to favor higher-fidelity, lower-entropy outputs.
- Post-processing hooks: The UI chains extra steps (e.g., upscaler, denoiser) as recipes to increase apparent resolution and reduce artifacts; these are integrated features in the Leonardo workflow.
Key Components:
- Lighting: Three-point setups, rim lights, godrays, volumetric shafts that imply participating media.
- Materials: Metal sheen, skin subsurface scattering, cloth micro-detail — all captured via
- Depth & occlusion: Layered composition, aerial perspective, ambient occlusion-like cues.
- Camera language: Focal length, aperture (e.g., “35mm, f/1.8”), lens bokeh, and motion blur metadata that makes a still read like a frame from a camera.
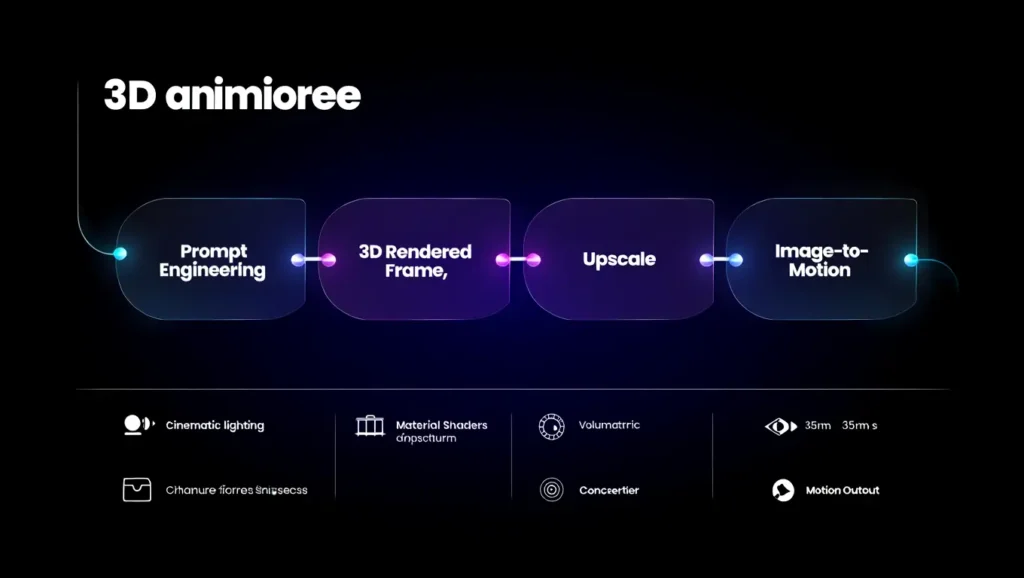
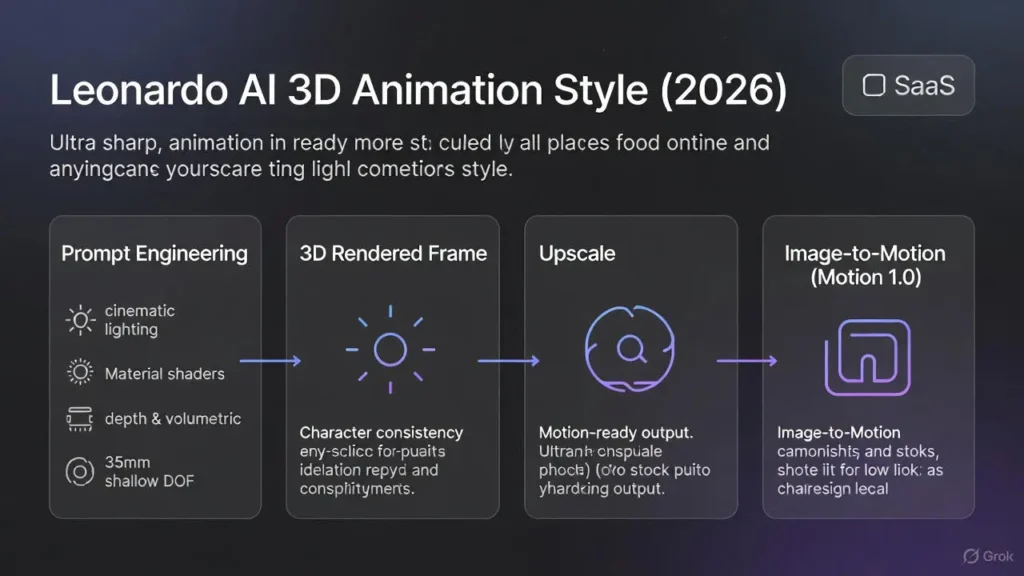
Where it Fits in a Pipeline
Concept → 3D Animation Style stills → Character Reference → Upscale & cleanup → generate depth/frames → Motion 1.0 → composite & edit.
Keyword Strateg
Treat the content as a set of sparse features your CMS wants to maximize for search ranking. Use the primary token string exactly and distribute semantically related terms as context tokens.
Primary Keywords:
- Leonardo AI 3D Animation Style
- Leonardo AI 3D Animation prompts
- Leonardo AI 3D render style
Secondary & Long-Tail (LSI) keywords:
- How to generate 3D animation images in Leonardo AI
- Pixar-like 3D animation prompts for Leonardo AI
- Leonardo AI Image-to-Motion 3D workflow
- Leonardo AI cinematic 3D render prompts
Leonardo AI 3D Animation Style Best Practices & Advanced Tips
- Start broad, then refine. Generate 8–12 variations with a broad prompt. Treat the best output as a posterior sample to condition your next prompt (i.e., reference image or seed). Leonardo’s UI supports iterative prompt improvement and variation tools.
- Use Character Reference for consistency. For repeated characters across shots, upload a style/character reference to anchor identity tokens and color palettes. This reduces inter-shot drift. Leonardo documents highlight Character Reference as a workflow tool.
- Choose the aspect ratio with end-use in mind. 16:9 for motion and storyboards; 4:5 or 3:4 for portrait character sheets; 3:2 or 1:1 for product/social hero images.
- Lighting is paramount. Explicitly specify direction, temperature, and function of lights: “key light left, warm 3200K; soft fill right; cool rim back.” These tokens anchor shading priors.
- Use negative prompts. No watermark, no text, avoid extra limbs — these act as exclusion constraints to suppress frequent failure modes.
- Upscale before motion generation. Use the Universal/Ultra Upscaler to increase pixel fidelity before generating motion frames — Leonardo’s recipes explain upscaler modes and endpoints.
- Save seeds/variants. If you need repeatability, record seeds and prompt metadata so runs are reproducible.
Advanced Hacks
- Layer adjectives for material realism: specular micro-highlights, micro-detail fabric weave.
- Add camera metadata: 35mm, f/1.8, shallow DOF.
- Use reference anchors: style reference: [uploaded_image_id].
- Step prompts: A → refine B → final C: change a single variable per pass.
Common Mistakes & How to Fix Them
Vague
- Symptom: Generic, flat images.
- Fix: Add subject specificity, lighting, and camera notes.
Ignoring lighting direction
- Symptom: Objects look pasted; shadows inconsistent.
- Fix: Specify key light from the left/top, soft fill from the right, warm rim.
Jamming too Many concepts
- Symptom: Jumbled composition.
- Fix: Generate elements separately (background, character) and composite.
Not using References
- Symptom: Character drift across images.
- Fix: Use Character Reference or upload style guides.
Upscaling/Interpolation Errors
- Symptom: Motion frames show artifacts due to low initial fidelity.
- Fix: Upscale before running Motion 1.0 recipes; Leonardo docs recommend this pipeline step.
Comparison Short Table
| Use case | Choose 3D Animation Style if… | Use Photoreal if… |
| Storyboards/animatics | You want rendered frames that read like film | You need realistic photos of real products/people |
| Character design | You want stylized, modelled characters | You want hyper-real portraits |
| You want a real product photography replacement | You want polished concept renders | You want real product photography replacement |
Step-by-step Tutorial
- Concept & rough prompt (explore).
3D animation style, [subject], [basic scene] — generate 12 samples with random seeds and a fixed temperature/top-k for diverse exploration. - Pick the best candidate.
Use quantitative heuristics (sharpness, composition, object completeness) and human curation. - Character/style reference pass.
Upload reference images or a small character sheet. Use the Character Reference tool to anchor identity and palette. - Refine for details.
Add material tokens (glossy metal, subsurface scattering), lighting (warm key, cool rim), and camera metadata (35mm, f/1.8). - Upscale & cleanup.
Use Universal/Ultra Upscaler to reduce noise and add micro-detail before motion. Leonardo’s upscaler recipes explain Ultra and Legacy modes. - Create depth/motion frames.
Export depth maps/segmentation (if available). Alternatively, generate successive frames with small camera offsets to provide Motion 1.0 with consistent source frames. - Apply Motion recipe (Motion 1.0).
Use Motion 1.0 recipes to interpolate camera movement and generate short clips; follow example recipes in Leonardo’s docs. Adjust interpolation strength and stabilization parameters. - Edit & composite.
Bring output into Premiere, DaVinci Resolve, or After Effects for sound, timing, and final color grade. - Export.
Render to your target format (H.264 for web, ProRes for production).
Comparison: 3D Animation Style vs Photoreal vs Anime presets
| Feature | 3D Animation Style | Photoreal Preset | Anime/Cartoon Preset |
| Texture realism | High — stylized shaders | Very high — photographic | Flat/painterly |
| Lighting focus | Cinematic, volumetric | Natural/photographic | Simple, cell shading |
| Best for | Storyboards, pre-viz, CGI look | Photo replacement, product shots | Manga, stylized characters |
| Motion pipeline | Integrated Image→Motion recipes | Possible, but tuning is required | Works differently per style |
| Complexity | Mid–high prompt detail | High metadata | Low–mid prompt detail |
Pricing & Resource Notes
Leonardo provides free and paid tiers with token/credit systems for generation and API usage. Pricing tiers (Free, Apprentice, Artisan, Maestro, etc.) change over time — check Leonardo’s pricing page and the docs for the current numbers and the pricing calculator for API credit planning. Leonardo’s pricing and plan docs list free-tier features (daily fast tokens), paid features, and API options.
FAQs Leonardo AI 3D Animation Style
A: The 3D Animation Style is a preset/style tag in Leonardo.ai that biases generation toward rendered CGI-style images with strong lighting, modeled materials, and cinematic composition — ideal for concept art and pre-viz.
A: Yes — Leonardo offers Image→Motion recipes (Motion 1.0) that let you convert stills into short clips or animatics; for final production, combine outputs with NLEs like Premiere or DaVinci Resolve.
A: Use Pixar-like descriptors, warm key + cool rim light, increase material detail (gloss, subsurface), and add camera metadata like 35mm, shallow DOF. Iteratively refine with style references.
A: Yes — upscaling reduces visible artifacts and gives cleaner frames for motion interpolation. Use Leonardo’s Universal/Ultra Upscaler before Motion 1.0.
Conclusion Leonardo AI 3D Animation Style
Leonardo AI’s 3D Animation Styleis best accepted as a powerful conditioning layer that adjusts how the model interprets prompts, prioritizing geometry, lighting, materials, and visual camera cues over flat illustration. By correcting the preset as a biasing mechanism—rather than an improving filter—you can design prompts that consistently produce render-ready frames, motion-friendly stills, and production-grade concept art. When mixed with structured prompt formulas, Character Reference, upscaling, and the Image→Motion pipeline, the style becomes a practical bridge between text and animated artwork. Even if you’re building storyboards, character sheets, product concepts, or short animatics, guiding this workflow lets you move rapidly from idea to motion while maintaining visual unity and quality.