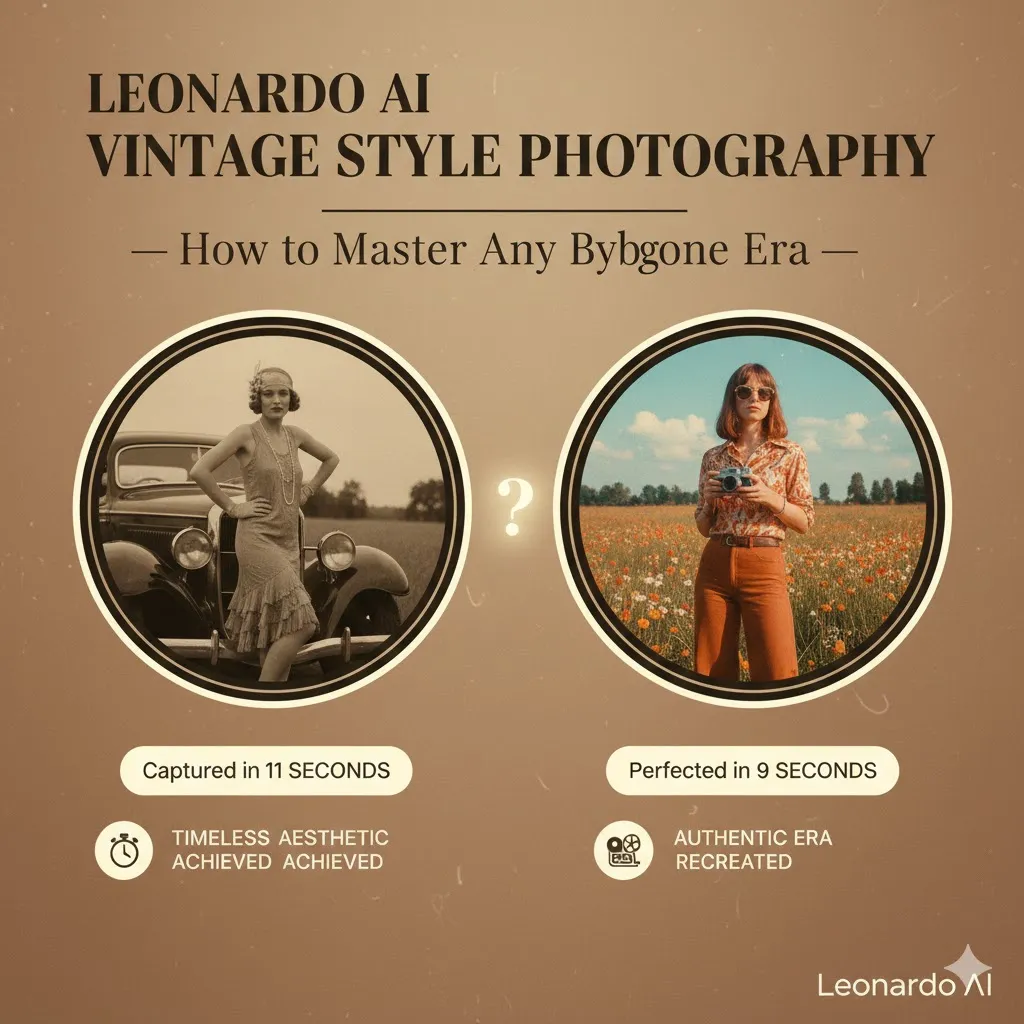
Leonardo AI Vintage Style: Fix the “Plastic” Look for 100% Pro Realism
Leonardo AI Vintage Style shouldn’t look like a cheap digital filter. Most creators waste 150+ tokens on “plastic” skin and fake grain. Want 100% authentic 35mm realism instead? This 4-minute guide reveals the exact models, Guidance Scales, and “Style Reference” settings to clone 1970s film stocks. Stop guessing and start creating high-res retro perfection that actually looks human. Vintage photography is no longer a passing aesthetic trend — it’s a communicative modality. Like an encoding format for emotion, older photographic looks transmit nostalgia, authenticity, and narrative weight that modern digital perfection often attenuates. In this guide, I reframe vintage-style photography through an NLP-inspired lens: prompts are templates, eras are style tokens, lenses are filters, and imperfections are high-value features.
What Is Leonardo AI Vintage Style Photography?
In NLP terms, Leonardo AI’s vintage-style photography is a conditional image-generation task. The model is the generator; your prompt is the conditioning vector. The target distribution is the visual statistics of analog-era photographs — their color priors, noise distribution, dynamic-range constraints, optical aberrations, and paper/scan artifacts. Your job is to craft conditioning that aligns the generator’s output distribution with that target distribution, then optionally apply deterministic post-processing (color grade, grain overlay, frame) to further refine the sample.
Concretely, instead of asking for “a photo,” you establish style tokens and attribute slots:
That structured prompt is analogous to a template in NLP: fill the slots, run the model, evaluate outputs, tune tokens. Repeat until the generated distribution visually matches your target.
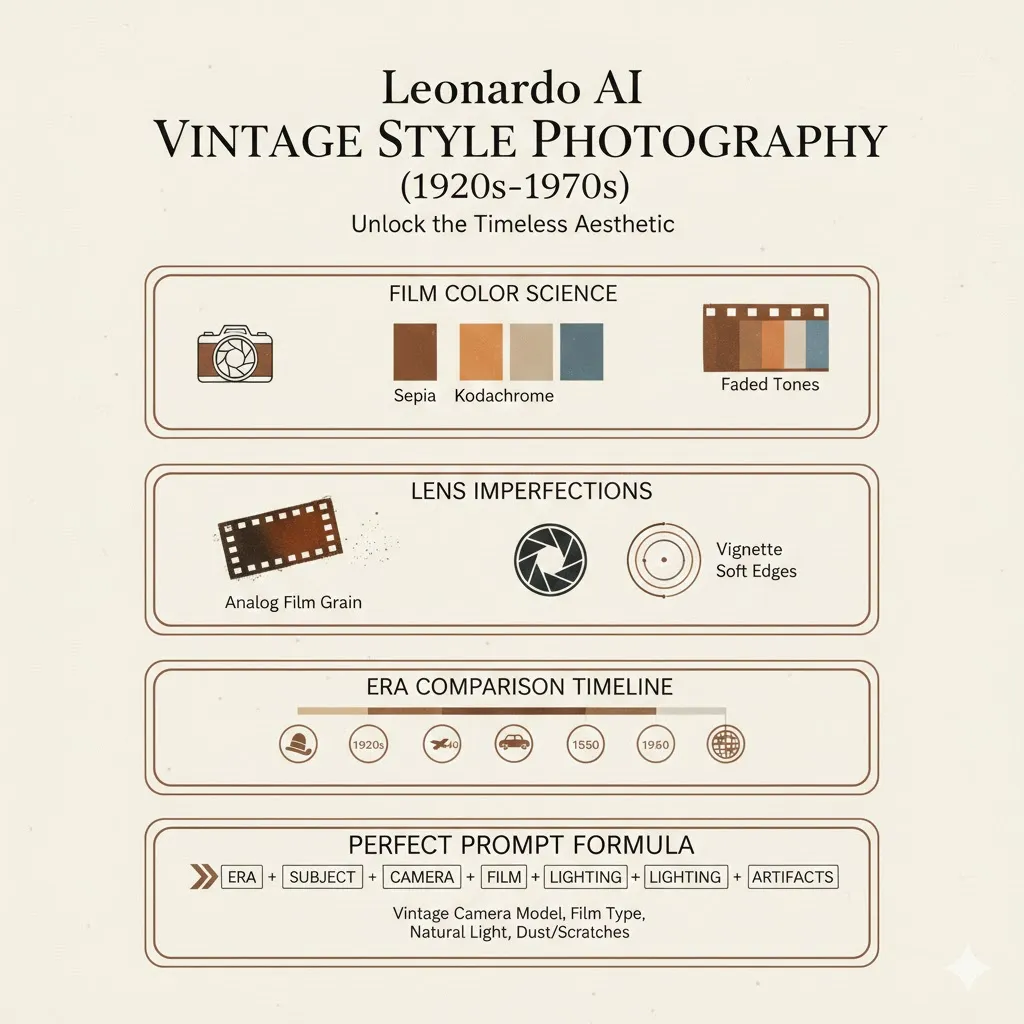
Why Vintage Photos Look the Way They Do — The Feature-Level Explanation
To control vintage style, you need to understand the generative features that produce it. Think of them as image-level features a classifier would learn.
Film Color Science (Color Priors & Transfer)
Different film stocks impose different color transforms: Kodachrome maps midtones to warmer reds, while older album prints lean sepia due to oxidation. In ML terms, these are color transfer matrices and non-linear tone curves. Prompting must specify the film family and the expected tonal curve (e.g., “Kodachrome saturation with warm midtones” or “sepia split-tone with yellowish highlights”).
Grain & Texture (Noise Distribution)
Film grain is spatially correlated multiplicative noise, not Gaussian digital sensor noise. Early films have large, visible grain kernels; later films have finer grain. In generator terms, grain acts like a learned texture prior. You request it explicitly: “heavy film grain, visible silver halide texture,” or apply a post-process multiplicative noise layer.
Dynamic Range & Contrast
Old optical systems and films had limited dynamic range. Shadows are often crushed, highlights may bloom. Treat this as a non-linear tone-mapping operation: compress highlights, deepen blacks, or use a contrast curve that simulates plate or film response.
Lens Imperfections (Point-Spread Function)
Vintage lenses have distinctive point-spread functions: soft corners, coma, spherical aberration, vignetting, and chromatic aberration. Think of these as convolution kernels that blur or color-shift edges. Prompting: “50mm portrait lens, soft edges, mild vignetting, slight chromatic aberration.”
Physical Artifacts (Sparse Event Noise + Surface Maps)
Dust, scratches, fold marks, paper texture, and light leaks are sparse events that break the visual perfection. These are crucial because they provide surface priors that humans associate with age. Commands: “add dust and scratches, light leaks, gentle paper texture, scalloped Polaroid border.”
Best Leonardo AI Models for Vintage Style Photography
In an NLP pipeline, you select architectures for your task; here, you choose Leonardo AI models for their learned priors.
- PhotoReal V2 — best generalist for authentic photographic realism. Use for portraits, editorial, and any scene requiring believable skin tones and lens physics.
- Photoreal Pipeline — optimized for portrait lighting and natural skin responses; ideal for lifestyle and human-subject imagery.
- Style Reference — useful when you want a consistent transfer across multiple images: use an example photo to anchor the style embedding.
- Universal Upscaler — final-stage module to safely amplify resolution and detail while retaining film-like texture.
Pro tip: Always prefer models and pipelines emphasizing photorealism. Avoid illustration-heavy or painterly models when your goal is archival authenticity.
Post-Processing Checklist
Even well-conditioned AI images benefit from deterministic post-processing, analogous to deterministic decoding.
- Add film grain overlay (multiplicative texture, adjust blend mode to “overlay” or “soft light”).
- Apply era-specific color grade (Kodachrome curves, sepia split-tone, or warm orange fade).
- Reduce global clarity and highlights slightly to mimic analog scattering.
- Add dust and scratches via a texture layer with low opacity.
- Place period borders (Polaroid white frame, scalloped edges, deckled paper).
- Subtle vignette to direct eyes and match lens falloff.
- Optional analog noise and scan lines for scanned photo realism.
- Upscale with care using Universal Upscaler; preserve film texture.
Pros & Cons
Pros
- Extremely realistic results when conditioned properly.
- Precise era control via tokens.
- Fast iteration without physical gear.
- Excellent for marketing, web hero images, and storytelling.
Cons
- Requires prompt engineering knowledge.
- Can produce images that are “too clean” unless imperfections are added.
- May need human-in-the-loop post-processing to reach archival authenticity.
Common Mistakes
| Problem | Fix |
| Looks too modern | Add era tokens: “no modern elements”, specify clothing and props of the period. |
| No grain | Add explicit “heavy film grain” or apply grain in post. |
| Flat lighting | Specify directional lighting: “golden hour backlight”, “Rembrandt key light.” |
| Colors too strong | Reduce saturation; use era color curves (e.g., “faded 1970s orange shift”). |
| Too sharp/AI-looking | Add film imperfections: scratches, dust, soft lens edges. |
Best Use Cases
- Instagram & Pinterest narrative content.
- Brand storytelling and campaign hero images.
- Album artwork and editorial spreads.
- Historical recreation and visual research.
- Portfolios and moodboards.
- Advertising that leans into nostalgia.
Troubleshooting & Iteration Strategies
- Lexical Ablation: Remove or replace single tokens to observe sensitivity; e.g., swap “Kodachrome” with “Vivid Kodachrome” and compare distributions.
- Temperature Analog: If the model offers sampling temperature or diversity, use it to balance fidelity vs. creativity.
- Style-Ensemble: Combine outputs from two photoreal models to ensemble the best features.
- Human-In-The-Loop Scoring: Save top outputs, score them for realism, then preferentially seed prompts that produced high scores.
Ethics & Rights Considerations
- Avoid generating images that impersonate real people without consent.
- If you use reference photos as style anchors, ensure you have the rights to those images.
- Label synthetic vintage imagery appropriately when used in historical contexts to avoid misinformation.
FAQs
PhotoReal V2 and Photoreal Pipeline provide the most authentic results. They carry strong camera and skin priors and reproduce lens/plastic artifact behavior well, making them ideal starting points. For batch consistency, anchor style using Style Reference and finalize with Universal Upscaler.
Yes. Use tokens like “instant film border” or “Polaroid frame” and specify aspect ratio (3:4 or 1:1). You can also add “scalloped edge” or “white instant frame with caption area” to achieve classic Polaroid looks. For precise control, add a post-processing layer with a vector mask to ensure consistent border thickness.
Yes. Use a hybrid pipeline: Style Reference to learn the original tone, Universal Upscaler for details, and targeted restoration prompts like “remove major scratches while preserving grain.” Consider combining inpainting tools for badly damaged areas, but keep grain and texture to avoid an over-restored, plastic look.
Add era-specific imperfections: explicit film grain, dust and scratches, light leaks, soft focus, slight color fading, and lens aberrations. Reduce global sharpness and clarity, avoid perfect symmetries, and include small organic defects (fold marks, paper texture) which human eyes expect in real vintage material.
Conclusion
Vintage-style photography with Leonardo AI is a predictable, repeatable process when you treat prompts as structured templates, era tokens as style anchors, and artifacts as high-value features. Think like an NLP engineer: design templates, run experiments, score outputs, and iterate. Add deterministic post-processing to bridge the last mile between a “good” AI sample and an image that convincingly reads as an artifact from the past. Vintage photography isn’t about perfection — it’s about personality. Leonardo AI, paired with a disciplined prompt-engineering workflow, can create images with the texture, color, and emotional density of photographs pulled from a family album.