Leonardo AI Shields — Michelangelo Dome vs AI Filters
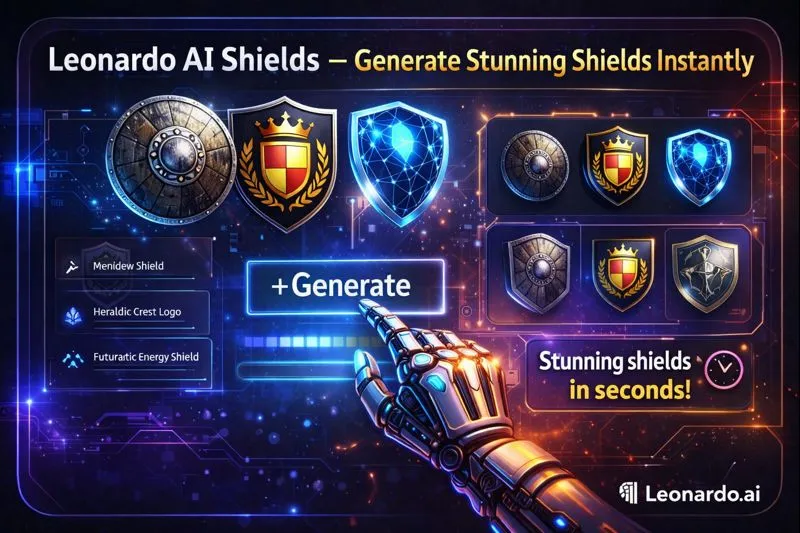
Leonardo AI Shields can clarify whether you’re researching Europe’s Michelangelo Dome defense system or fixing blocked prompts on Leonardo.ai. In just 5 minutes, understand both shields, unlock practical fixes, and avoid costly confusion. Read on to get clear answers fast and see real results. This document reconceives your practical Leonardo.ai shield workshop as an NLP/dataflow engineering playbook. Leonardo AI Shields Think of each generated image as the decoded output of a conditional generative pipeline: the prompt becomes an embedded conditioning vector, model choice determines the decoder’s inductive bias, Canvas operations act as iterative conditioning updates (localized inpainting / constrained decoding), and the Universal Upscaler is a super-resolution post-processor that refines high-frequency detail.
Upstream, negative prompts function like constraint losses or adversarial regularizers that bias generations away from undesired modes. This guide teaches both how to craft conditioning signals (prompts + reference assets + negative constraints) and how to manage the full production pipeline from ideation to export for games, print, or logos. This rewrite uses NLP and generative-model terminology so creative technologists, pipeline engineers, and technically literate designers can implement reproducible, scalable shield generation workflows.
Inside the Shield: How This Guide Solves Confusion Fast
Shields are compact but semantically dense artifacts: they encode identity, epoch, material physics, and symbolic information all in one token. Generative imaging models decode compact conditioning (your prompt + optional image references) into pixel outputs. To make consistently strong shield outputs, you need to design a robust conditioning pipeline:
- Define the semantic intent (style, material, usage).
- Encode that intent into a prompt template (structured input).
- Seed the model with texture references via Canvas (image-conditioning).
- Generate multiple candidates (sample the model’s posterior).
- Select and refine using iterative inpainting (local conditioning updates).
- Apply a learned super-resolution (the Universal Upscaler) to resolve microstructure—engraving, stitches, welds—and export to the target domain (game engine, print, vector).
This guide supplies structured prompt templates, model recommendations (Phoenix, Lucid Origin, Albedo), negative prompt tokens (constraint list), troubleshooting mapped to failure modes, and an explicit prompt-pack blueprint ready for packaging as a ZIP.
Discover What You Can Really Do with Leonardo AI Shields
After following this guide, you will be able to:
- Define a repeatable conditional generation pipeline for shield artifacts.
- Translate design requirements (e.g., “engraved Celtic pattern, readable at 512px”) into model inputs and settings that maximize prompt adherence.
- Repair artifact-prone outputs using constraint-based negative prompts and Canvas inpainting.
- Upscale outputs to production-grade resolution using the Universal Upscaler (tunable style modes).
- Export imagery aligned with platform constraints (Unity/Unreal PBR maps, 300 DPI print, or vector tracings).
- Package and monetize prompt packs with an awareness of licensing and provenance.
In other words, you will be able to design an input → model → refine → super-resolution → export pipeline that produces production-ready shields reliably.
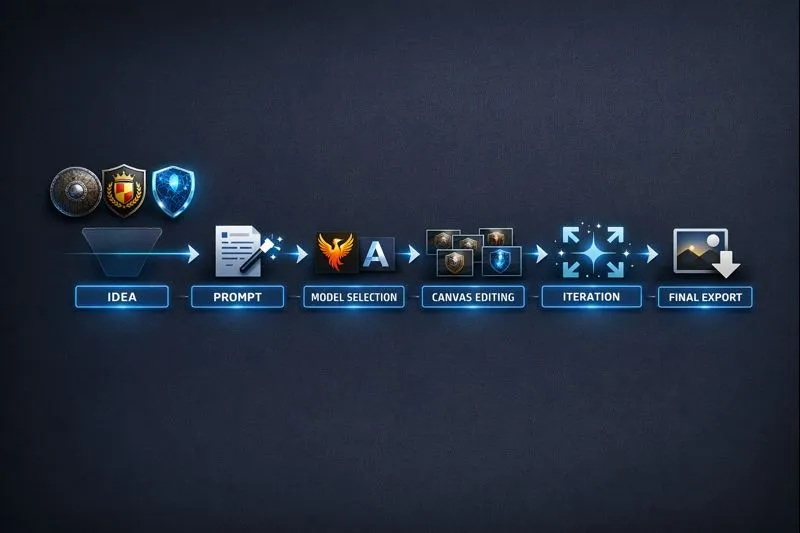
Step-by-Step: How Leonardo AI Shields Go from Idea to Masterpiece
We’ll map every human task to a machine task and show expected model operations.
Intent encoding (define the conditioning vector)
Before prompting, create a structured intent document:
- Purpose (target domain): Pame asset, banner logo, print poster, token sprite. This determines final resolution and whether you need vector output.
- Style (prior): Photoreal, stylized digital painting, flat vector, neon sci-fi.
- Material (surface properties): Steel, bronze, wood, leather, energy field.
- Ornamentation (semantic tokens): Celtic knot, laurel wreath, monogram, runes.
- Shot/pose (viewpoint): Flat-front orthographic (for logos), 3/4 angled (for props), scene-integrated.
- Adjectives/constraints: List 3–5 strong descriptors (e.g., “ornate, weathered, embossed”).
Record this as metadata (JSON or markdown) per generation for reproducibility.
Prompt template → conditioning vector
Use the Anatomy of Prompt (below) to turn the intent into a structured prompt string that the model can parse reliably.
Batch sampling (posterior exploration)
Generate 4–8 samples per prompt. Treat these as stochastic draws from the model posterior P(image∣prompt)P(image | prompt)P(image∣prompt). Keep prompts constant across the batch to vary only sampling seeds — this isolates sample variance vs prompt effects.
Canvas & image-guidance (image-conditioning)
Use Canvas to upload texture references (metal grain, leather, patina) — image-conditioning anchors the model’s latent to realistic microstructure. Canvas edits (inpainting) are localized re-conditioning operations: you can replace a region with a refined prompt to produce constrained decoding.
Compositing & selection (ensemble fusion)
If variant A has superior emblem geometry and variant B has superior lighting, use a compositor (Photoshop, Affinity) to merge via masks and multi-pass blending. This is equivalent to ensembling multiple decodes and fusing high-confidence features.
Super-resolution & export
Run Universal Upscaler to resolve micro-detail lost at generation resolution. For game engines, convert to PBR maps if needed (use Substance or AI-driven map generators). For vector logos, generate flat-color PNGs and trace to SVG.
Choosing the Right Leonardo Model & Settings
Treat models as decoder families with different inductive biases and learned priors.
| Use-case (semantic prior) | Recommended Model | Key settings (conditioning) | Upscaler | Why (inductive bias) |
| Photoreal metal & engraving | Phoenix | Quality: High, samples ↑, deterministic seeds for retries | Universal Upscaler (CINEMATIC) | Strong surface/material priors; excellent prompt adherence for text/engraving |
| Cinematic colorful sci-fi | Lucid Origin | Quality: High, enhance color, enable bloom/glow tokens | Universal Upscaler (ARTISTIC) | Emphasizes vibrancy, glow, and cinematic lighting |
| Flat heraldic logos (vector) | Albedo / Vector | Style: Vector, transparent background flag, high resolution | Optional (trace to AI vector) | Learns flat color & clean-edge priors; outputs traceable shapes |
| Animated sequences/passes | Veo / Video | motion blur, particle passes, frame seeding | Video render workflow | Tuned for temporal coherence and particle simulation |
Why these picks?
Phoenix has learned denser material grammars enabling crisp micro-detail. Lucid Origin’s latent space emphasizes chroma and luminescence, so it excels with glow and holography. Albedo is trained on flat-color and graphic datasets, making it efficient for logos.
Iteration & Canvas Tips
Think of Canvas as a local re-conditioning editor that performs contrastive inpainting: you replace a region and the model re-decodes pixels conditioned on the mask and the updated prompt. Use these tactical tips:
- Reference textures: Mpload high-resolution metal grain, leather, or embroidery textures. The model will incorporate microstructure statistically.
- Masking workflow: Mask only the area you need to change. Large masks reduce conditioning precision.
- Prompt chaining: when editing, append short prompts that emphasize the local target (e.g., “enhance Celtic knot, sharper engraving, finer linework”).
- Iterative denoising: Perform low-intensity edits over multiple passes rather than a single heavy pass.
- Record versions: Label each Canvas edit with prompt, model, and seed for reproducibility.
Fixing Common Issues — Quick Shield Design Solutions
We map common visual failures to corrective conditioning strategies.
Failure Mode → Cause → Corrective Conditioning
- Weird geometry / extra limbs
Cause: Model hallucination due to unconstrained object semantics.
Fix: Add negative tokens: no distorted geometry, no extra limbs, no floating parts, –no faces, and increase sampling for higher-likelihood decodes. - Text/watermark artifacts
Cause: Model overfitting to training watermarks/text tokens.
Fix: Negative prompt: –no text, –no watermark, remove all text, and if persistent, crop or use Canvas to remove. - Flat lighting / dull metal
Cause: Missing specular cues in prompt.
Fix: Add “dramatic side key light, rim light, studio 3-point lighting, specular highlights” and increase quality/samples. - Blurry micro-engraving
Cause: Generation resolution too low for high-frequency detail.
Fix: Increase generation resolution (if available), increase samples, and run Universal Upscaler; add macro detail, ultra-detailed tokens. - Texture tiling / repeating artifacts
Cause: Overuse of texture references without variation.
Fix: Use multiple texture refs, instruct “non-repeating texture, natural variation, avoid tiling”.
Keep a persistent negative prompt cheat-list and apply it as a baseline to all runs.
Shield Styles Decoded — 4 Ready-to-Use Designs & NLP Secrets
Each recipe includes both a conditioning string and ML-aware tips (why parts of the prompt matter).
Medieval weathered shield — Photoreal
Tips:
- Use hammered steel and micro-scratches to bias the material before microstructure.
- An engraved Celtic knot acts as a geometry anchor.
- Macro detail signals the super-resolution before preserving high frequencies.
- Negative: no extra limbs, no text, no watermark.”
Tips:
- Flat vector style triggers the vector prior.
- Request a Transparent background to get an alpha-ready PNG.
- Generate at high resolution (4096px) to reduce post-trace noise.
Logo-style Metal Badge (client deliverable)
Prompt:
“Polished metallic shield badge, engraved monogram, brushed steel finish, soft specular highlights, simple 2-color palette, transparent background, centered composition.”
NLP tips:
- Keep symmetry and negative space.
- For logos, request simple 2-color and vector-style tokens to maximize traceability.
Post-Processing, Upscaling & Export Workflows
Typical pipeline (practical steps)
- Draft generation: Create at 1024–2048 px.
- Select candidate(s): Choose the best emblem, lighting, and geometry.
- Local cleanup (Canvas): Inpaint or refine details.
- Super-resolution: Use Universal Upscaler (2×–4×) tuned to ARTISTIC or CINEMATIC.
- Domain conversion: Generate PBR maps or vector traces depending on the target.
- Final export: PNG/TIFF/SVG with appropriate color profile.
Upscaler heuristics
- 2× for web assets.
- 4× for print or 4K renders.
- CINEMATIC style for photoreal finish (preserves specular highlights).
- ARTISTIC style for stylized or painterly outputs.
Exporting for Games (Unity/Unreal)
- Resolution: 2048×2048 or 4096×4096 PNG (square) for most use-cases.
- Map generation: Create Albedo (base color), Normal, Roughness, Metallic maps. Use Substance or AI map tools to synthesize from the diffuse.
- Engine testing: Import into a test scene using neutral lighting to evaluate roughness/specular interaction.
Exporting for Print & Merchandise
- Resolution: 300 DPI TIFF or high-resolution PNG.
- Color space: convert to CMYK only if the printer requires; provide a color proof.
- Bleed: add bleed margins depending on print product.
Exporting for Logos / Vectors
- Prepare PNG: Flat colors, high contrast, transparent background.
- Trace: Use Illustrator’s Image Trace with 2-color or high-fidelity options; clean up paths.
- Deliver: SVG and PDF variants.
Case studies & Real-world workflows
TTRPG token pack — fast production
- Strategy: Reuse a base prompt but swap emblem tokens and weathering modifiers programmatically.
- Process: Programmatically generate 20 variants, select top 20 via human review, upscale to final resolution, batch convert to 512×512 tokens with alpha.
- Outcome: ~80% reduction in manual painting time.
Indie game asset pack — lighting consistency
- Strategy: Fix a single HDRI lighting descriptor in the prompt template.
- Process: Use Phoenix for metalwork for all assets to maintain consistent specular signatures. Composite and produce maps.
- Outcome: Consistent specular highlights across assets, faster visual QA.
Model & Settings Comparison Table
| Use | Model | Quality | Upscaler | Why |
| Photoreal metal & engraving | Phoenix | High | Universal (Cinematic) | Prompt adherence & readable detail. |
| Cinematic / colorful sci-fi | Lucid Origin | High | Universal (Artistic) | Rich chromatic and glow handling. |
| Flat logos/vector | Albedo / Vector | High | Optional | Clean edges for tracing. |
| Animated shields | Veo / Video | Render frames | Video workflow | Temporal coherence & particle passes. |
.
Troubleshooting Quick Cheatsheet
- Weird edges/geometry → negative: no distorted geometry, no extra limbs.
- Text appears → negative: no text, no watermark.
- Blurry tiny details → increase samples, generate larger, use Universal Upscaler.
- Colors too flat → use Lucid Origin or add color-vibrancy tokens.
- Hard-to-trace logo → request flat vector style, minimal noise, high contrast, and generate high-res.
FAQs
A: Use Phoenix for high-fidelity metal surfaces, engraving, and prompt adherence. Phoenix’s learned material priors and high-detail decoder are best for capturing readable engraved text and micro-scratches.
A: If Leonardo supports transparent background generation, request a transparent background in the prompt. If not, export a PNG, then use Photoshop or an AI selection tool to mask and save as PNG with alpha; alternatively, generate against a neutral color and use automatic background removal.
A: You must verify Leonardo.ai’s current Terms of Service and help center for the exact licensing rules; these change over time. Treat commercial use as permitted only after explicit licensing confirmation.
A: Generate a clean PNG with flat colors and high contrast. Then use Illustrator’s Image Trace (2-color or high fidelity), clean the paths, and export as SVG/PDF.
A: Yes — there are ideation tools and small web-based shield sketchers. Use them for rough concept exploration and then move to Leonardo.ai for high-fidelity, controllable outputs.
Conclusion
Leonardo AI Shields are a powerful example of applying conditional generative pipelines to a clear creative problem. The key to production-quality output is a structured pipeline: define intent, construct a prompt (conditioning vector) using the anatomy template, sample multiple candidates, refine with Canvas inpainting (localized re-conditioning), use Universal Upscaler for super-resolution, and export to the target domain.
If you follow the recommendations — Phoenix for photoreal metal & engraving, Lucid Origin for vibrant sci-fi, and Albedo for vector-ready logos — you’ll achieve consistent, reproducible results. Keep a negative prompt list for constraints, always document model + seed + prompt, and verify Leonardo.ai licensing before commercial distribution.