
Leonardo AI SDXL 1.0 — What No One Tells You
Leonardo AI SDXL 1.0 can generate images 5× faster with sharper detail and consistent style control. In just 15 minutes, achieve studio-grade visuals that normally take hours. Test real prompts, compare benchmarks, and unlock pro workflows. Try it now and see real, measurable results in your creative output. This is a long, hands-on technical playbook that reframes Stable Diffusion XL 1.0 (SDXL 1.0) in NLP-style terms and maps it to Leonardo.ai’s production features. You’ll get a systems view (model architecture & conditioning), operational recipes for reproducible photorealism (seed locking, sampler choices, tokenized prompt design), a practical Elements (LoRA-like) training workflow, a rigorous benchmarking rig and CSV-ready test table, common failure modes with algorithmic fixes, and a comparative analysis (SDXL 1.0 vs SDXL 0.9 vs Leonardo Lightning XL). At the end there’s a production checklist, a mini case study for blog presentation, and an offer for downloadable prompt/benchmark assets.
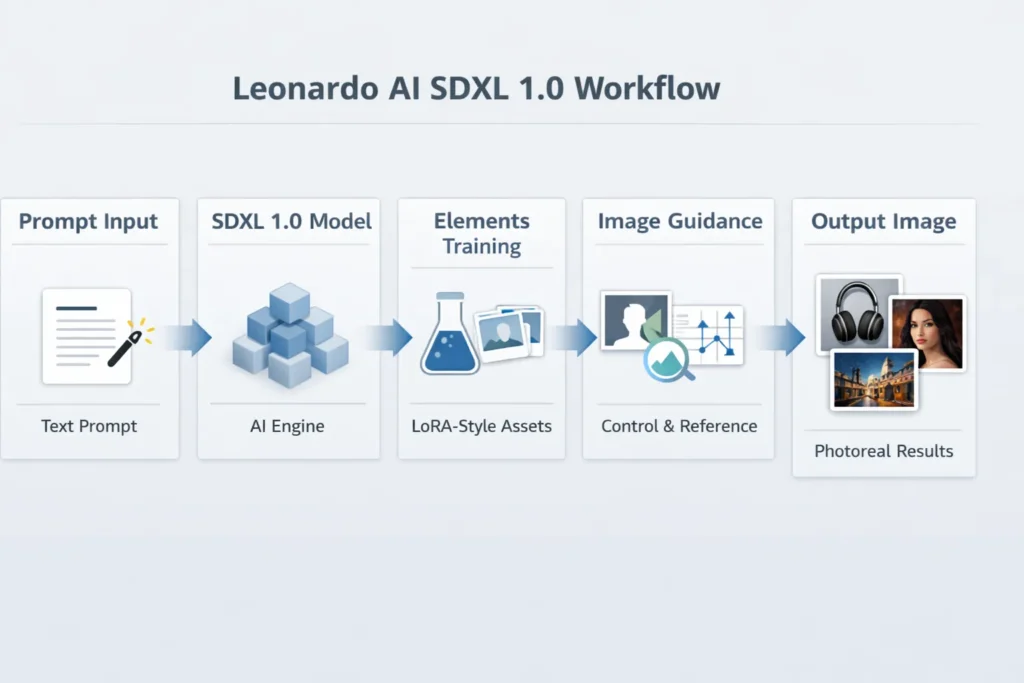
What This Guide Actually Covers (And Why It Matters)
Viewed from a researcher’s or ML engineer’s lens, image generation with SDXL 1.0 is a conditional generative modeling problem: text tokens are converted into dense conditioning vectors, cross-attended into a large U-Net style denoiser operating in latent space, and the diffusion sampler progressively denoises a noise prior into an image latent that’s decoded to pixels. Leonardo.ai wraps that core pipeline in production plumbing — tokenized prompt assistants (Prompt Magic), small parameterized style modules (Elements), and image-conditioned guidance channels (Image Guidance) — so teams can treat generation as a deterministic, testable microservice rather than an ad-hoc experiment.
This guide translates brand-level workflows into reproducible ML procedures: how to design prompts like conditioning prompts (with style tokens and negative tokens), how to version Elements as small transfer-learned modules, how to benchmark using statistically valid A/B tests (N ≥ 30), and how to integrate generation into CI/CD via the API. Everything is written so product designers, ML engineers, and content teams can run identical tests and ship consistent photoreal assets.
Quick verdict — who should use SDXL 1.0 on Leonardo.Ai
Use SDXL 1.0 on Leonardo.ai if your product requirements map to:
- High photoreal fidelity and consistent image composition (product photography, advertising assets, catalog images). SDXL 1.0 provides a robust base distribution for neutral, realistic renders.
- Reproducibility and versioning — you need deterministic pipelines: lock seeds, lock Elements, and run API-based batch jobs with controlled samplers.
- Team workflows — non-ML stakeholders (designers, brand stewards) should be able to attach Elements, and prompt presets to produce brand-compliant outputs.
If you need maximum creative divergence or a very specific tonal character (e.g., SDXL 0.9’s sometimes-warmer grain), include SDXL 0.9 and Leonardo Lightning XL in your A/B matrix. Lightning XL is optimized for throughput and cost; SDXL 1.0 is tuned for fidelity.
What SDXL 1.0 Really Is (And Why It Changed Image AI)
At a high level, SDXL 1.0 is a conditional diffusion model where the conditioning path is text embeddings produced by a text encoder (often CLIP-style or an improved tokenizer/encoder). From the NLP perspective:
- Tokenization & embedding: The input prompt is tokenized into subword units, embedded into a sequence of dense vectors, and optionally augmented with special tokens (style tags) that represent trained Elements or LoRA-like adapters.
- Cross-attention conditioning: Embeddings are input to cross-attention layers inside the U-Net denoiser to modulate image generation at multiple resolution scales — analogous to how transformer decoders attend to encoder outputs in seq2seq models.
- Latent diffusion: Instead of operating in pixel-space, SDXL uses a latent representation (lower-dimensional) where diffusion steps are computationally cheaper — comparable to compressing language into embeddings before sequence modeling.
- Classifier-free guidance (CFG): CFG is used to amplify conditioning strength: the denoiser runs a pair of conditioned/unconditioned inferences and extrapolates between them using a guidance scale (similar to controlling beam search vs. unconstrained sampling).
- Two-stage pipelines: SDXL 1.0 often adopts a coarse + refinement pipeline: first a base latent is produced, then a refinement pass (higher-res U-Net or upsampler) adds detail — analogous to coarse-to-fine decoding in language generation.
Key Practical Implications for Engineering Teams:
- Conditioning strength (CFG scale) is a lever controlling faithfulness vs. creativity, akin to temperature in text generation.
- Seeds + RNG determinism must be locked across all generation parameters to achieve reproducibility.
- Elements behave like small adapter modules: apply them at conditioning time to bias sampling toward a particular visual manifold.
Unlock True Performance
When benchmarking image generators, adopt an experimental design similar to A/B testing in ML:
What to Measure
- Human preference (primary): Collect blind pairwise preference data (N ≥ 30 raters). Use the same viewing conditions (same display, same resolution).
- Prompt adherence: Binary/graded scoring of whether requested attributes are present (e.g., “white seamless background,” “brand color matches”).
- Artifact rate: Number of images with obvious artifacts per 100 images (hands bad, text nonsense, face artifacts).
- Latency & throughput: Average time per image and images per GPU-hour.
- Cost per image: Dollars per image at target resolution & steps.
- Diversity score: LPIPS or other perceptual-distance measure across generated samples for the same prompt/seed ranges (if you want variance).
Experimental Design: A/B Testing Essentials
- Fix seed, prompt (tokenized string), steps, sampler, resolution, and scheduler across models to isolate differences.
- Randomize presentation order in human evaluation.
- Use blind scoring to avoid brand/model bias.
- Collect metadata for each sample: model_tag, element_versions, seed, sampler, scale, steps, runtime_ms.
Example Benchmark Table
| Test name | Model | Prompt (short) | Seed | Steps | Sampler | Resolution | Primary metric |
| Product studio A | Leonardo – SDXL 1.0 | “Studio photograph of [PRODUCT], white seamless, 50mm f/2.8, photoreal” | 12345 | 28 | DPM++ | 1024×1024 | Fidelity / specular highlights |
| Product studio B | Leonardo – SDXL 0.9 | same | 12345 | 28 | DPM++ | 1024×1024 | Warmth/shadow depth |
| Environmental portrait | Leonardo – SDXL 1.0 | “Environmental portrait… golden hour… 85mm” | 98765 | 36 | DPM++ | 2048×2048 | Skin texture/face fidelity |
| Cinematic scene | Leonardo Lightning XL | “Dusk city street, rain reflections, cinematic” | 55555 | 40 | DPM++ | 2048×858 | Global composition |
Log results in CSV columns: test_name, model_tag, prompt_text, seed, steps, sampler, resolution, run_time_ms, cost_usd, human_fidelity_score, artifact_flag, notes.
LoRA Training Secrets for Real Results
Elements are Leonardo’s low-footprint, versioned adapters that bias generation. For ML engineers, this is transfer learning with a small parameter budget.
Why Elements?
Elements let product teams treat learned style constraints as deployable artifacts: you can attach an Element to any prompt to bias the generation without retraining the whole model. Mechanistically, they function similarly to LoRA adapters or bias vectors.
Step-by-step Element training (practical)
- Data collection (30–200 images):
- Minimum: ~30 curated images.
- Sweet spot: 100–200 images of high quality, consistent style, and variedposes/lighting.
- Label metadata (subject, lighting, camera tags).
- Create Element project:
- Upload images to Leonardo’s Element trainer.
- Provide consistent metadata and tags (e.g., brand: Acme, palette:matte_black).
- Pick base model & Hyperparameters:
- Target base: SDXL 1.0.
- Conservative default hyperparams: small learning rate, limited epochs, early stopping.
- Save checkpoints.
- Validation & evaluation:
- Maintain a test set of 5–10 prompts that exercise the Element across scenarios.
- Check for overfitting (Element should generalize, not memorize backgrounds/props).
- Iterate dataset:
- Remove outliers and mislabeled samples.
- Re-train with an adjusted learning rate or different augmentation policies.
Version & lock for production:
- Tag Element version (e.g., element-v1.2).
- Log the seed and param bundle for reproducibility.
Quick operational tips
- Use Elements for characters, product finishes, brand palettes, and consistent photographic looks.
- Track changelog with seed/prompt pairs that demonstrate Element behavior.
- Use Elements to reduce negative prompt complexity — they anchor style.
API vs UI — What Really Pays Off
Cost Realities
SDXL-sized models consume more GPU memory and compute than smaller variants. Cost is a function of:
- Resolution (2048×2048 >> 1024×1024).
- Steps (more denoising steps → more compute).
- Number of passes (refinement + upscaler passes add cost).
- Batch size & throughput.
Practical approach: Run a staged rollout:
- 10-image check: Sanity for target resolution.
- 100-image smoke test: Estimate per-image latency, artifact rate.
- 1,000-image pilot: Estimate cost at scale.
UI vs API Tradeoffs
- UI: Quick iteration, non-technical stakeholders, prompt templates.
- API: Automation, batch generation, audit logging, reproducibility (seed management, deterministic RNG across calls).
Production checklist
- Version Elements and model tags.
- Store seeds & parameter logs for each generation.
- Add a moderation/rights-check step in the pipeline.
- Cache up-scaled images to cut regen cost.
- Monitor concurrency and rate limits on the API.
Failures Exposed — Fixes That Work
Most problems recur across teams. Here’s a technical catalog with programmatic fix strategies.
Hands/Fingers Malformed
Cause: Generative model’s failure mode for complex joint articulations and occlusions in the visual prior.
Fixes: Targeted negative tokens (deformed_hands), inpainting with high-quality hand references, multi-pass generation (coarse pose → hand inpaint), or use a specialized hand-reference Element.
Face Artifacts / Uncanny Valley
Cause: Low-quality face rendering from a latent denoiser or poor conditioning.
Fixes: Enable face-refinement (specialized upsampler), pass a face reference/alignment skeleton, or attach an Element trained on consistent face images.
Composition Messy/Overcrowded
Cause: Model mixing too many semantic objects due to ambiguous prompts.
Fixes: Use image-guidance with pose skeletons, issue stricter cardinality constraints (e.g., “one subject, center frame”), or composite scenes in layers (generate background, then foreground with masked inpainting).
Text Unreadable Inside Images
Cause: Generative models generally don’t render legible vector text reliably.
Fixes: Avoid embedding critical text in model renders; overlay text in post with vector tools or use template-based overlays.
Color/Mood Mismatch
Cause: Model not matching reference palette or lighting cues.
Fixes: Pass an Image Guidance palette reference, or create an Element encoding brand palette.
Excess Noise/Detail Loss
Cause: Sampling hyperparams or too aggressive denoising.
Fixes: Increase steps slightly, use refinement pass and upscaler, or tune denoising strength in the image-to-image pipeline.
Image-to-Image Workflows Unlocked
Image Guidance is essentially a second conditioning stream. Think of it as multi-modal fusion: text embeddings + image/structure embeddings concatenated or attended to by the denoiser.
Common Integration Patterns
- Pose transfer + Elements: pass skeleton/pose maps as Image Guidance and attach a character Element for identity consistency.
- Product variants pipeline: generate a base product shot, then run low-denoising image-to-image passes to change color/texture without disturbing composition.
- Inpainting fixes pipeline: target small regions (hands, faces, logos) with masked inpainting rather than redrawing the whole image.
- Automation: pipeline = generate(base) → detect problems (automated artifact detector) → inpaint→ upscaler → moderation → store.
Head-to-head: Leonardo SDXL 1.0 vs SDXL 0.9 vs Leonardo Lightning XL
| Dimension | Leonardo SDXL 1.0 | SDXL 0.9 | Leonardo Lightning XL |
| Release & role | Baseline SDXL 1.0 checkpoint used for fidelity | Earlier SDXL variant; different tonal priors | Platform-tuned engine optimized for speed/cost |
| Photorealism | Strong baseline, improved textures & composition | Warmer, sometimes preferred for portraits | Optimized for consistent, fast outputs |
| Stability | High | Medium | High (engine tuned) |
| Throughput/cost | Higher compute per image | Slightly less refined (lower cost) | Optimized for speed and lower per-image cost |
| Best for | Product photography, VFX bases, high-fidelity assets | Certain portrait aesthetics | High-volume production where cost matters |
Takeaway: SDXL 1.0 should be your fidelity baseline; Lightning XL should be evaluated where throughput and unit cost are critical. Always compare with identical seeds and technical settings.
Test Pricing Like a Pro
A practical, low-risk experiment plan:
- 10-image check: Confirm that target resolution & prompt produce satisfactory outputs.
- 100-image smoke test: Measure latency, artifact frequency, and approximate cost. Run across the three models to compare the cost-quality envelope.
- 1,000-image pilot: Simulate production workload. Measure API stability, concurrency limits, moderation throughput, and overall per-image cost.
Pros & Cons
Pros
- Solid photoreal baseline with SDXL 1.0.
- Strong Leonardo.ai tooling: Elements, Prompt Magic, Image Guidance.
- API + UI flexibility for teams.
Cons
- SDXL models are more expensive per image.
- Some artists/communities prefer SDXL 0.9 aesthetics for certain scenes.
- Standard generation failure modes (hands, faces, text) still need procedural fixes.
Benchmark Case Study — How to Present Results on your Blog
Methodology
- Prompt A: studio product shot; seed 12345; steps 28; sampler DPM++; 1024×1024.
- Models: Leonardo SDXL 1.0, Leonardo SDXL 0.9, Leonardo Lightning XL.
- Evaluation: blind scoring by N=30 raters on fidelity, prompt adherence, and artifacts.
- Cost: recorded per-image cost using the vendor’s billing data during test.
Presentation Tips
- Show triptychs (three-column images) with overlayed parameter badges (model_tag / seed/steps/sampler).
- Include a three-column scoring table: fidelity | adherence | artifact_rate.
- Keep methodology short and reproducible: list exact seeds, prompts, and samplers.
cost matter, evaluate Leonardo Lightning XL. Keep your benchmark scripts and CSV metadata public to make your blog posts reproducible and trustworthy. If you want assets (prompt pack, CSV benchmark file, or blog-ready tables with sample outputs), request them, and I’ll generate them in chat immediately.
FAQs
Q1 Answer (expanded): Yes—Leonardo’s model roster includes SDXL 1.0 among its engines. Treat the model tag like an immutable artifact; confirm exact model IDs and preset names in the app or API and log them in your experiments because vendors may re-tag or update checkpoints.
Q2 Answer (expanded): Practical Element datasets often start at ~30 images; results generally improve up to ~100–200 high-quality, curated samples. Elements are low-parameter adapters, so they need fewer samples than full-finetuning—but quality, consistency, and diversity of examples (poses, lighting) are essential.
Q3 Answer (expanded): If photoreal fidelity matters over cost, start with SDXL 1.0. If you need speed and cost-efficiency at scale, benchmark Leonardo Lightning XL (or other optimized engines) and measure human preference and artifact rate before making a final selection.
Q4 Answer (expanded): Community tests show tonal and texture differences across model checkpoints. SDXL 0.9 may produce a warmer or grainier aesthetic that artists like; SDXL 1.0 aims for neutral, cohesive photorealism. A/B test with locked seeds to determine which appeals to your use case.
Conclusion
Framing SDXL 1.0 in NLP terms clarifies exactly how to make generation repeatable and testable at scale: treat prompts as conditioning sequences, Elements as adapter modules, and Image Guidance as multi-modal conditioning. Leonardo.ai packages these concepts into product features that let teams move from creative exploration to production pipelines quickly. For production workloads, lock seeds, version Elements, and run rigorous smoke tests to estimate cost and artifact rates. Where fidelity matters, start with SDXL 1.0; where scale and