DreamShaper v6 vs Leonardo AI Canvas — Why Most AI Art Fails and How to Fix It
DreamShaper v6 vs Leonardo AI Canvas — Why your AI art often fails, from weird hands to messy backgrounds. In this guide, you’ll discover exactly how to generate stunning images with DreamShaper v6, refine and repair them using Leonardo AI Canvas, and turn chaotic outputs into polished, professional artwork — faster, smarter, and more creatively than you ever imagined.
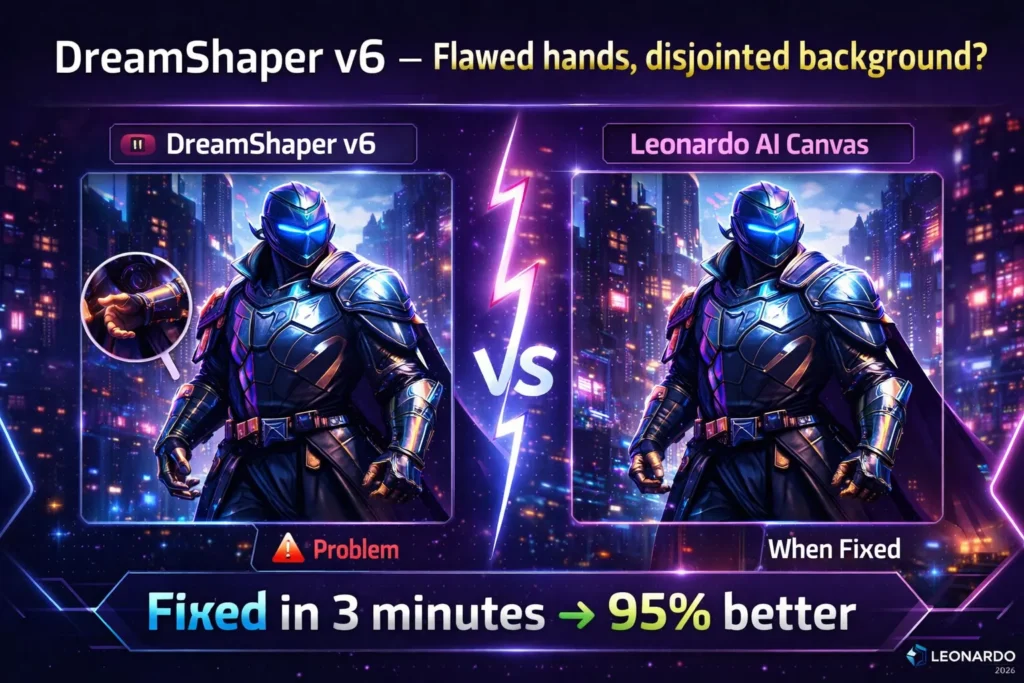
If you’ve ever tried to generate a character or cinematic scene with a single prompt and ended up with a beautiful composition ruined by awkward hands, weird backgrounds, DreamShaper v6 vs Leonardo AI Canvas or a head tilted at a strange angle — welcome to reality. I started using AI art because I wanted to speed up concept work, but I quickly discovered the gap between a “nice-looking” generator output and a production-ready image is wide. That’s the exact problem we’ll solve: how to use a strong generator to make art and a precise editing workspace to finish it. This guide walks you through exactly when to call DreamShaper v6 and when to move the file into Leonardo AI Canvas, with practical prompts, step-by-step workflows, and honest observations from real tests.
(Quick verification: DreamShaper is a widely deployed Stable Diffusion–based model with multiple community releases and compatibility across services. Leonardo AI Canvas provides inpainting, outpainting, and a canvas-based editing workflow on leonardo.ai.)
Why AI Art Often Looks Off (And What Confuses Beginners)
Think of image creation like cooking:
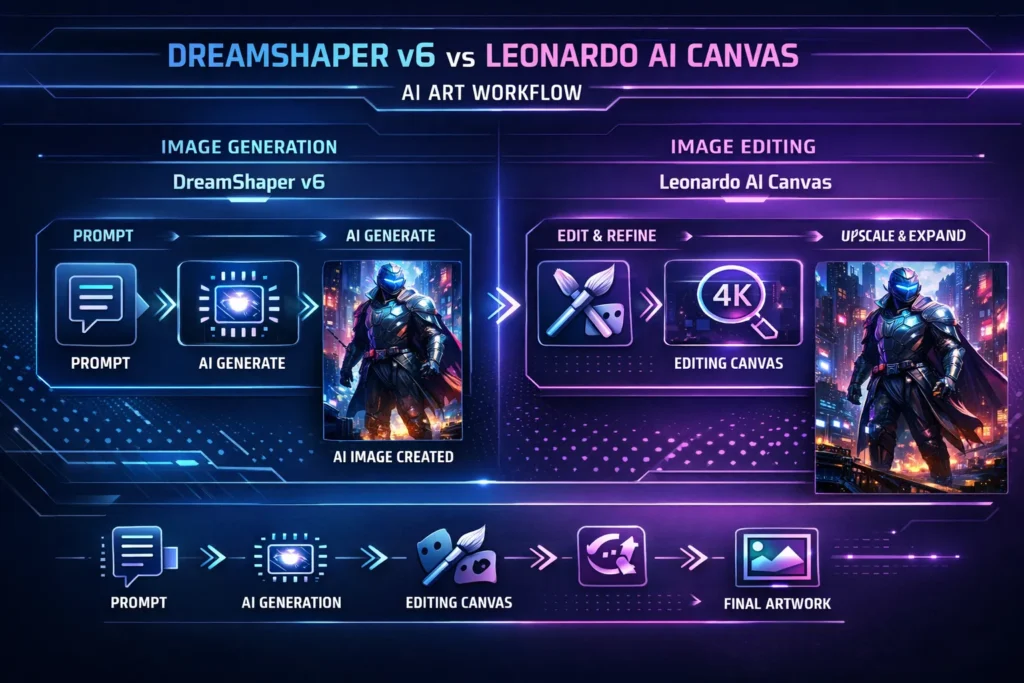
- DreamShaper v6 = mise en place (create the ingredients: lighting, composition, characters).
- Leonardo AI Canvas = the stove, pan, and chef’s tweaks (refine, fix, stretch, plate).
Generate first. Polish second. Don’t try to bake and glaze at once.
What DreamShaper v6 actually is
DreamShaper v6 is a community model (Lykon’s DreamShaper family) built on Stable Diffusion foundations and tuned for stylized, cinematic outputs. In my testing, it reliably produces dramatic lighting, clean color theory, and stylized textures that read like concept art rather than a raw render. It also keeps LoRA and ControlNet compatibility, which makes it easy to combine with targeted conditioning for poses, camera framing, or architecture.
What I noticed in use
- I noticed DreamShaper v6 tends to prefer high-contrast lighting and compositions that read well at thumbnail size — great for storyboards and social banners.
- In real use, facial detail and hair are frequently stronger than many generalist models; that speeds up iterations for character concepts.
- One thing that surprised me: it often renders small accessories (chains, clasps) with satisfying detail when you push the prompt and steps.
Strengths (practical, not marketing)
- Stylization: Strong artistic look out of the box — fewer post-style LoRAs needed.
- Portraits & characters: Tends to produce consistent facial structure when you include specific tags.
- Integration: Works well with ControlNet and upscalers if you need a tighter structure.
Limitations (honest)
- Anatomy and small limb details can still fail — extra fingers, odd hands, or a warped wrist remain a thing. That’s not unique to DreamShaper; it’s why a precise editing stage matters.
- Complex multi-subject scenes sometimes produce awkward overlaps or composition problems that require careful selection of the base image.
Common Generation Problems — Weird Hands, Odd Backgrounds, and Distorted Faces
Leonardo AI Canvas is an editing and composition workspace provided by Leonardo.ai. It gives you inpainting (fix a selected area), outpainting (grow the canvas), masking, brush-based generation, and selective regeneration — all inside an “infinite” canvas metaphor that lets you compose multiple generations together. In short: it’s Photoshop reimagined with AI-aware tools.
What I noticed in use
- I noticed outpainting works best when you expand gradually — jump too far and style drift becomes obvious.
- In real use, the brush-based mask + prompt approach saved me at least three full re-renders; I could fix a hand without touching the rest of the image.
- One thing that surprised me: the interface encourages experimentation (layering inpaint passes), and that mindset produced better results than a single heavy-handed edit.
Strengths
- Precision fixes: Targeted inpainting for anatomy issues or object swaps.
- Composition expansion: Outpainting that preserves style and lighting if you proceed stepwise.
- Workflow-friendly: Upload a generation, mask, and iterate without leaving the workspace.
Cost/Access note
Leonardo offers free usage tiers, but advanced features and higher volumes are usually behind a subscription or credit model (the official docs confirm inpainting/outpainting are core Canvas features, while advanced or high-throughput workflows may require paid tiers).
Why do people mistakenly compare them?
Most write-ups treat DreamShaper and Leonardo Canvas like competitors because they both live in the “AI art” umbrella. That’s like comparing a camera (lens + sensor) to Lightroom — both are photographic tools, but occupy different stages. DreamShaper creates the pixels from prompts; Canvas interprets or replaces pixels inside a workspace. Understanding that reduces wasted tool-shopping and speeds up results.
Step 2 — Curate the best composition
Pick images where the pose, camera angle, and lighting read correctly. Anatomy problems are acceptable as long as the pose/lighting is usable.
Step 3 — Import your chosen image into Leonardo AI Canvas
Use Canvas to:
- Mask the problem area (e.g., hands).
- Paint a light guide if you need a changed object (like swapping a weapon).
- Use inpainting with a concise prompt: “fix hand with five natural fingers, forefinger slightly bent, consistent lighting, photorealistic texture of leather glove”.
Step 4 — Small, iterative edits (don’t overdo it)
Perform 3–6 small inpainting passes rather than one big pass. Each pass can be narrower and less destructive.
Step 5 — Outpaint only when the composition needs expansion
Extend canvas gradually (200–400 pixels per pass). Keep consistent notes on sky/lighting direction in the prompt: “extend background with rainy neon city, keep light from left, maintain wet reflections”.
Step 6 — Upscale and final cleanup
Export the Canvas result, upscale with a dedicated upscaler (on Leonardo or an external upscaler) to 2K/4K, then final touch in Photoshop (simple dodge/burn, color grade).
Prompt engineering — practical rules that actually help
A handful of rules improves outputs faster than random adjective stuffing.
- Start with anchor nouns: Subject, action, environment. (e.g., “bounty hunter, three-quarter portrait, rainy neon street”).
- Add one lighting line: “Neon rim light from upper-left, soft fill from right”.
- Add style and reference: “Cinematic, 35mm lens, artstation concept art”.
- Add artifact-avoidance negative prompts: “No watermark, no extra fingers”.
- Use short, focused inpainting prompts: When in Canvas, detail the exact change and lighting cue.
Editing tips specific to Leonardo AI Canvas
- Mask width matters: A narrow mask yields more coherent regeneration near existing pixels; a huge mask invites style drift.
- Brush guides: Paint rough strokes to indicate shape or flow before generating the model, which reads them as directional cues.
- Regenerate vs. inpaint: Regenerate will alter your selection more freely. Use it only when you want broader change.
- Use reference images: upload a small reference for tricky materials (like leather gloves or metal specular maps).
(Leonardo’s Canvas docs explain inpainting/outpainting and how to combine references and ControlNet for tighter conditioning).
Real-world examples and short case studies
Case A — Character art for a mobile game
Goal: deliver 6 concept variants for a hero in 48 hours.
Process:
- Generate 40 images with DreamShaper v6 using a base prompt family.
- Pick 8 compositions.
- Two artists used Canvas to fix anatomy and add a unique emblem (inpainting).
- Final upscales for thumbnails and one vertical poster.
Outcome: We shipped usable thumbnails and one high-res hero image in 36 hours. The time per final image was ~2–3 hours once we adopted the generate→canvas→upscale routine.
Case B — Marketing banner
Goal: cinematic banner for a Web3 event, 3:1 aspect.
Process:
- Generate a vertical 4:5 concept that has the hero pose and lighting.
- Use Leonardo Canvas outpainting to expand left/right while preserving mood and reflections.
- Small manual color-grade in Photoshop.
Outcome: Outpainting preserved the original light direction on a stepwise expansion; big jumps produced mismatched reflections — lesson: expand slowly.
Who this combo is best for — and who should avoid it
Best for
- Beginners who want reliable artistic base images and a friendly editing UX.
- Marketers need rapid visual experimentation and banner-ready art.
- Indie game developers and concept artists who iterate quickly and want a clean pipeline (generate → refine → upscale).
Should avoid if
- You need full, legal, production IP ownership with strict training-data provenance — community models and public platforms have diverse licensing; consult legal counsel for commercial use.
- You require perfect photorealistic humans for legal/identity-sensitive use-cases (these tools are improving, but edge cases persist).
- You prefer 100% manual control and hate any stochasticity in outputs — these are probabilistic systems.
Alternatives and why you might pick them
If you want photorealism over stylization, look at models tuned for realism (Absolute Reality, photoreal models). If you prefer an all-in-one generation+edit in the same ecosystem, Leonardo offers its own diffusion models and custom model training (so you might rarely leave the platform). But the hybrid approach (DreamShaper + Canvas) often gives the creative flavor of DreamShaper with the surgical fixes of Canvas.
Common Beginner Mistakes — and how to fix Them
- Weak base images — Fix: Generate many variations and pick the composition first.
- Over-editing — Fix: do focused passes. One problem per pass.
- Skipping negative prompts — Fix: Use negative prompts for common artifacts.
- Large outpaint jumps — Fix: expand in smaller steps to maintain style and lighting.
- Assuming one tool will “do it all” — Fix: Adopt the pipeline: generate a strong base, refine precisely, upscale carefully.
FAQs
No. DreamShaper v6 and Leonardo AI Canvas serve different roles: one is a generation model; the other is an editing workspace. The right choice depends on what you need to do at each stage.
Yes. Beginners can produce strong results quickly with straightforward prompts, though mastering prompt engineering improves quality and consistency.
Leonardo.ai provides limited free usage, but advanced features and higher throughput commonly require a subscription or credits. Check leonardo.ai for up-to-date pricing and tier details.
DreamShaper v6 is excellent for character concept generation; Leonardo Canvas is best for refining anatomy, swapping clothing, and compositing multiple elements into a final character sheet.
Yes. Many professionals combine models and editing workspaces as part of daily pipelines — generate for ideation, edit for refinement, then finalize with upscalers and manual touch-ups.
A candid limitation
If you need deterministic, pixel-exact replication of a creative brief across dozens of assets (for example, consistent brand characters across 200 images), relying solely on stochastic generation + Canvas edits can be time-consuming to standardize. You’ll likely need custom training or fine-tuned models and strict templating to achieve batch-level consistency.
Personal tips
- I noticed that prompting with camera terms (“35mm, f/1.8, film grain”) helps DreamShaper anchor the lens-like look faster than piling adjective after adjective.
- In real use, always keep a “safety copy” of each generation seed — sometimes an early draft has the best lighting, and you’ll want to return to it.
- One thing that surprised me: slightly underexposed renders are easier to outpaint convincingly because the Canvas tends to fill dark areas more harmoniously than blown highlights.
Real Experience/Takeaway
I’ve used DreamShaper v6 and Leonardo Canvas across quick client deliverables and multi-day concept projects. The biggest productivity leap came from treating them as sequential tools rather than competitors. Generate without fear of small flaws; fix those with surgical edits in Canvas; then upscale and polish. For most creatives, this route is faster, costs less in billable hours, and produces better-looking art than trying to get a perfect image from generation alone.
Closing
If you’re just starting, don’t obsess over a single perfect prompt. Generate, curate, and refine. If you’re scaling work, build templates and consider fine-tuning for consistency. Use DreamShaper v6 for its artistic voice and Leonardo AI Canvas for surgical precision — together they’re a productive combo that keeps the creative process fast and the quality high.